
If your team keeps answering the same questions, repeating the same demos, or fixing the same mistakes, you don’t just have a “training problem”—you have a consistency problem. A well-produced training video solves that by turning your best employee’s knowledge into a repeatable, on-demand system. The challenge is that most training videos fail for one simple reason: they’re filmed like a quick update, not designed like instruction.
In this guide, you’ll learn how to plan and shoot professional training video filming the right way—so it’s clear, consistent, and easy to follow. We’ll cover pre-production planning, essential equipment (with smart budget options), and on-set best practices you can use immediately.
Why Professional Training Videos Matter in 2026 (And What “Professional” Really Means)
Training outcomes you can measure
Professional training videos aren’t about cinematic shots—they’re about reliable outcomes. When learners can clearly see and hear each step, training becomes easier to repeat, easier to update, and less dependent on who’s available to teach. In safety and compliance environments, quality training also supports safer behavior by making expectations and procedures easier to understand and recall.
On the learning-design side, research on multimedia learning shows that people learn better when words and visuals are structured to reduce overload and guide attention (instead of forcing the viewer to “figure out” what matters). That’s why great training videos use clean visuals, concise narration, and purposeful on-screen cues—because the brain has limited capacity and benefits from well-designed instruction.
Common pain points that make training videos fail
Here’s what we see most often when teams attempt training video production internally:
- Audio you can’t understand (echo, HVAC noise, mic rubbing on clothing)
- Lighting that hides the work (shadows on hands, glare on screens, backlit subjects)
- No instructional structure (long introductions, missing steps, no recap, no “what good looks like”)
- Too much “talking head” without visual proof (viewers need to see the steps)
- No review process (SMEs don’t sign off, so errors get published)
When DIY is “good enough” vs when you need a production team
DIY can work if the topic is low-risk (e.g., internal culture updates) and the cost of misunderstanding is minimal. But for safety, compliance, customer-facing scripts, machine operation, or multi-location onboarding, professional production usually pays for itself by reducing rework and avoiding confusion.
Quick self-assessment: If you answer “yes” to three or more, lean professional:
- Does a misunderstanding create safety, compliance, or customer risk?
- Will 50+ people use this training over the next 6–12 months?
- Do you need consistent messaging across teams/locations?
- Will you repurpose this video for onboarding, SOPs, or LMS modules?
- Do you need polished visuals that reflect your brand standards?
For high-risk environments, particularly construction and industrial sites, professional training videos play a crucial role in reinforcing safe behaviors and consistent procedures, which we will explore in more detail in our guide on construction industry training videos focused on compliance and safety.
Note: You’ve probably heard the “8-second attention span” claim—treat it carefully. Researchers and reviewers have pointed out that this statistic is often repeated without clear methodology. Instead of chasing myths, focus on instructional clarity: short segments, clear steps, and helpful visuals.
Filming is one stage of a bigger system; the training video production guide covers the types, formats, costs and ROI questions that come before and after the shoot.
Pre-Production: The Step Most Teams Skip (And the One That Prevents Reshoots)
Define one clear objective per video
Before you touch a camera, write one sentence: “After watching, the learner will be able to…” If your video has three objectives, split it into three shorter modules. This single change improves retention, reduces re-takes, and makes future updates painless.
Choose the right training video format
Use the format that best matches the skill being taught:
- Talking head + B-roll: Best for policy, onboarding, leadership messaging
- SOP walkthrough: Best for step-by-step processes (warehouse, shop, office ops)
- Screen recording: Best for software training, CRM, admin workflows
- Roleplay scenarios: Best for sales, service calls, conflict resolution
- Demonstration: Best for tools, equipment, product training, assembly
Scriptwriting for training (not marketing)
Training scripts should be simple, direct, and consistent. Marketing copy tries to persuade; training copy tries to prevent mistakes. A practical structure that works across industries:
- Context: Why this matters (one sentence)
- What you need: Tools, materials, PPE, access
- The steps: Numbered, one action per step
- Common mistakes: What to avoid and why
- Quality check: What “done correctly” looks like
- Recap: 3-bullet summary + next action
When you align script and visuals, you follow evidence-based guidance from multimedia learning research: keep content focused, reduce unnecessary distractions, and use visuals to support the message.
In highly regulated fields like healthcare, accuracy, privacy, and a controlled production environment are essential, which is why privacy-compliant workflows, such as those used in healthcare training videos in Calgary, require a more professional and structured approach.
Storyboarding & shot lists that speed up filming
A storyboard doesn’t have to be fancy. Even a simple shot list prevents “missing coverage” (the #1 reason teams reshoot). Your minimum shot list for most training videos:
- Wide: Shows the environment and safety context
- Medium: Shows the person doing the work
- Close-up/inserts: Shows hands, controls, labels, settings
- Over-the-shoulder: Great for screens and tools
- Proof shot: Final result so learners know what “correct” is
Location planning (office, shop, warehouse, jobsite)
Location is a technical decision, not just a backdrop. In offices, HVAC and echo are common problems. In shops and warehouses, noise and harsh overhead lighting can ruin usable audio and create ugly shadows. For safety-focused training, OSHA guidance emphasizes training quality and clarity as part of an effective approach—so plan for a quiet space, controlled light, and a clear demonstration zone.
Real-world example: If you’re filming a tool demo on a reflective metal table under warehouse lights, you’ll likely get glare and hand shadows. A simple fix is moving to a matte surface (rubber mat) and adding soft light from the front/side—your learners will immediately see the steps more clearly.
If you want Storimatic Studio to review your script and shot plan before you film, we can help you avoid reshoots and build a repeatable training workflow—especially for onboarding, SOP libraries, and compliance modules.
High-quality training videos are developed long before filming begins, and detailed scripts, storyboards, and learning objectives are essential, especially when following a structured pre-production planning strategy for training videos.
Before you book crew or lights, work through a business video pre-production checklist: locking the brief, shot list, site access and approvals first is what stops missing-coverage reshoots.
Training Video Equipment: What You Need (Minimum) vs What Pros Use
Camera choices: smartphone, mirrorless, cinema
Here’s the truth: your camera matters, but not as much as your audio and lighting. A modern phone can produce a sharp image—yet still look “cheap” if the lighting is harsh or the audio is unclear. Use this table to pick the right tool for your training video production level:
| Option | Best For | Pros | Cons |
|---|---|---|---|
| Smartphone | Quick updates, low-risk internal training | Fast setup, great autofocus, easy sharing | Limited lens control, weaker low-light, audio often neglected |
| Mirrorless camera | Most professional training videos | Better lenses, cleaner image, strong low-light | Needs setup knowledge (focus, exposure, storage) |
| Cinema camera | High-volume libraries, brand-critical training | Maximum control, dynamic range, production reliability | Higher cost, requires experienced crew |
Stability gear: tripod, monopod, gimbal
Training is about clarity, not motion. A solid tripod instantly makes your video feel more professional and reduces viewer fatigue. Use a gimbal only when movement teaches something (e.g., a walk-through of a site layout or a customer flow).
Audio gear (most important): lavalier, shotgun, recorder
If you invest in one thing, invest in audio. Learners will tolerate a “good enough” image, but they won’t rewatch a video they can’t understand. Clear audio also supports accurate learning—especially when instructions include safety steps, warnings, or exact wording.
| Mic Type | Best Use | Strengths | Watch Outs |
|---|---|---|---|
| Lavalier (clip-on) | Talking head, walking demos, busy environments | Consistent voice level, great isolation | Clothing rustle, placement matters |
| Shotgun (on boom/camera) | Seated interviews, controlled rooms | Natural sound, no mic on clothing | Picks up room echo if space is untreated |
Practical tip: Record 10 seconds of “room tone” (silence) in every location. It helps editors smooth cuts and reduce noise without making audio sound unnatural.
Monitoring & teleprompter tools
An external monitor helps you catch soft focus and bad exposure before it becomes a reshoot. A teleprompter is especially useful for compliance language, HR policies, and customer-facing scripts where wording must be consistent.
Training reality: Subject-matter experts are rarely actors. A teleprompter plus “chunked” scripts (short sections) keeps filming calm and efficient while maintaining accuracy.
Storage, power, and backups
Professional training video filming depends on reliability: extra batteries, extra memory cards, and a simple file naming system. The goal is to protect your footage and keep post-production organized (especially when you’re building a training library over time).
Evidence note: Organizations often adopt eLearning because it can reduce logistical costs like travel and facilities, and scale training delivery across teams. A peer-reviewed review in the online learning field highlights cost advantages of e-learning compared with traditional classroom instruction.
This kit suits an office, shop or controlled demo zone. When the lesson has to be filmed on an active jobsite, rugged construction video gear is the better choice, because dust, noise and weather will knock a studio setup out of action.
Expert Insight (Quick Quote)
Instructional video design isn’t guesswork. Research on multimedia learning emphasizes designing with human cognitive limits in mind—so learners aren’t overloaded and can focus on the steps that matter. That’s why the best training videos are structured, segmented, and visually supportive—not noisy or cluttered.
FAQ (Part 1): Professional Training Video Filming
What matters more: camera quality or lighting and audio?
For training videos, audio clarity and controlled lighting usually matter more than the camera. If learners can’t clearly hear steps or see details, the training fails—no matter how “high-end” the footage looks.
How long should an employee training video be?
Aim for one objective per video and keep modules short enough to rewatch easily. If the process is long, break it into chapters (e.g., setup, step-by-step procedure, quality check, troubleshooting).
Should we script training videos word-for-word?
If accuracy and compliance wording matter, yes—script it. If it’s more of a walkthrough or demo, a structured outline plus key phrases can feel more natural while staying consistent.
Halfway Recap: What You Can Implement Immediately
- Define one outcome per training video to keep it clear and modular.
- Build a simple shot list (wide, medium, close-ups) to avoid reshoots.
- Prioritize audio—a lav mic often delivers the biggest quality jump.
- Use a repeatable workflow so your training library feels consistent over time.
Next up (in the second half): lighting setups that instantly elevate quality (including three-point lighting), on-set filming best practices, editing for retention, and a publish-ready QC checklist.
Lighting for Training Videos: The Practical Guide (No Film School Needed)
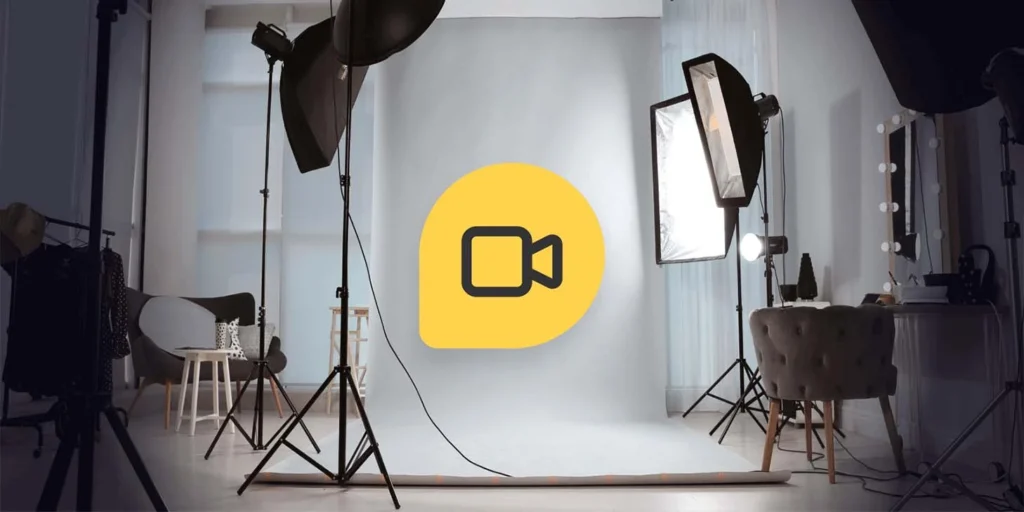
If your footage looks “flat,” “grainy,” or “unprofessional,” lighting is usually the reason—not the camera. Good lighting makes faces look natural, reduces harsh shadows on hands, and helps learners see details like labels, buttons, and correct positioning.
Why lighting changes perceived “professionalism” instantly
Lighting does three critical things for professional training video filming:
- Clarity: Learners can see steps, tools, and hand placement without guessing.
- Consistency: Multiple modules look like one cohesive training series (important for libraries).
- Credibility: When your visuals are clean, learners trust the instruction more—and follow it.
Three-point lighting explained (key, fill, back light)
You don’t need a studio to use three-point lighting. You need a repeatable approach:
- Key light: Your main light. Place it 30–45° to one side of the camera, slightly above eye level.
- Fill light: Softens shadows from the key. Place it on the opposite side at lower intensity.
- Back light (hair/rim): Separates the subject from the background. Place it behind and above, aimed at shoulders/head.
Training-first rule: If learners need to see hands, controls, or a screen—light the work area as carefully as the face.
Lighting modifiers: softbox, diffusion, and controlling glare
Hard light creates harsh shadows (especially on hands and tools). Soft light wraps around the subject and reduces glare:
- Softbox: Great all-purpose modifier for talking head training and demos.
- Diffusion: Softens an LED panel when highlights look too sharp.
- Flagging/bounce: Use a white foam board to fill shadows, or a black flag to reduce spill and glare.
Color temperature (Kelvin) and mixed lighting problems
Mixed lighting is one of the fastest ways to make training video footage look “off.” A common example: daylight from a window (cool) plus warm office lights (yellow). Pick one look and commit:
- If you’re using daylight, turn off mismatched overhead lights.
- If you’re using LEDs, match all lights to the same color temperature.
- Lock white balance—don’t leave it on auto if your background changes.
Lighting different training scenarios
Talking head training (desk/office)
For onboarding, policy, and leadership modules, aim for a clean, friendly look:
- Soft key light slightly off-camera for natural facial modeling.
- Gentle fill to keep shadows from looking “dramatic.”
- Background separation (back light or practical background lamp) so the subject pops.
This approach aligns with established principles from multimedia learning research, which show that learners retain information better when visuals and narration are intentionally structured.
Hands-on demo (table, tools, product)
Hands-on demos fail when learners can’t see details. A reliable setup:
- One soft overhead or 45° key light aimed at the work surface.
- A second soft fill from the opposite side to reduce hand shadows.
- Close-ups (insert shots) for critical steps like tightening, alignment, labels, and settings.
Whiteboard, flip chart, and screen visibility
Glare is the enemy. Angle the board/screen slightly away from the key light, and avoid pointing a strong light directly at glossy surfaces. If you’re filming software training, consider capturing the screen directly and using the camera only for context and instructor presence.
Warehouse/shop/jobsite lighting
In industrial spaces, overhead lighting is often harsh and unflattering—and audio can be challenging. Choose portable lights you can position, and plan your shoot schedule around quieter windows. If the training is safety-related, remember that effective instruction must be clear and understandable to the workforce, including language and vocabulary considerations.
Micro-tip: Light the subject first, then adjust the background. If the subject looks clean, learners stay focused—even if the background is simple.
On-Set Best Practices: How to Film Training Videos That Are Easy to Follow
Framing & composition for training clarity
Training videos need stable, repeatable framing. That means:
- Keep it consistent: Use the same camera height and framing across modules.
- Prioritize visibility: If hands are important, frame the work area clearly—even if it’s not “cinematic.”
- Minimize distraction: Clean backgrounds, minimal clutter, and brand elements placed intentionally.
Sound check workflow (before every take)
Professional training video filming lives or dies by audio. Before recording, run a 45-second checklist:
- Mic placement (lav centered, not rubbing clothing; shotgun aimed correctly).
- Record a test sentence at real speaking volume.
- Listen with headphones for echo, hum, HVAC, or clothing noise.
- Record 10 seconds of room tone.
Performance direction for non-actors
Most subject-matter experts aren’t comfortable on camera—and that’s okay. The secret is coaching, not “acting”:
- Use chunking: Record in short sections (15–60 seconds) to reduce mistakes and speed up editing.
- Speak like you teach: Clear, calm pace. Pause naturally before and after key steps.
- Show, then say: Demonstrate the step while explaining it (or vice versa) so learners can follow.
Using on-screen callouts and cutaways
Great training videos guide attention. This is closely aligned with multimedia learning principles—adding cues and reducing unnecessary content helps learners focus on what matters.
- Step numbers (“Step 2 of 6”)
- Labels for tools, settings, and parts
- Safety reminders and “stop points”
- Close-ups for critical actions
B-roll strategy for training (what to capture every time)
Think of B-roll as “visual proof.” If a learner can’t replicate the step from the visuals, you need more coverage. Capture:
- Wide safety context (PPE, workstation setup)
- Hands doing the step (multiple angles if needed)
- Close-ups of labels, torque settings, measurements, screen fields
- Final “correct result” shot
- Optional: controlled example of common mistakes (only if safe and permitted)
Micro-tip: If a step has safety or quality risk, film it twice: wide for context + close-up for accuracy.
Post-Production: Editing Training Videos for Retention (Not Just Looks)
Editing priorities: clarity, pacing, and structure
Editing is where training becomes easy to follow. Your priorities should be:
- Segmenting: Break content into short chapters and logical steps (great for LMS modules).
- Coherence: Remove filler, tangents, and repeated explanations.
- Signaling: Use on-screen cues to highlight what matters (steps, warnings, key terms).
These approaches map well to established multimedia learning research: learners do better when content is structured and distractions are minimized.
Graphics that help learners (without clutter)
Use graphics like a good instructor uses a pointer: sparingly, clearly, and at the right moment.
- Step counters and checkmarks for completion
- Labels for parts, tools, and settings
- Arrows to show direction and placement
- “Pass/Fail” examples for quality checks
Captions, transcripts, and accessibility (also boosts usability)
Captions and transcripts aren’t just “nice to have.” They increase comprehension in noisy environments, support diverse teams, and improve accessibility. WCAG includes a success criterion for captions for prerecorded synchronized media (with defined expectations for what captions include).
Transcripts also help people who prefer reading, those with attention or cognitive needs, and learners who want to search or review specific steps quickly.
Providing captions and transcripts also supports accessibility, following guidelines for prerecorded video content, and improves comprehension in real-world learning environments.
Audio cleanup and consistency
Professional polish often comes from consistency:
- Normalize voice levels so volume doesn’t jump between clips.
- Reduce hum and background noise carefully (avoid making voices sound robotic).
- Keep music minimal or skip it entirely for instruction-heavy modules.
Delivery formats for LMS and internal platforms
Plan deliverables based on where the video lives:
- LMS modules: chaptered videos, consistent naming, thumbnails, captions.
- Teams/Slack intranet: shorter cuts, strong titles, quick recaps.
- Multi-location training: standardized intros/outros and version control (“v2.1”).
Quality Control Checklist: The “Before You Publish” Training Video Review
Content accuracy review (SME sign-off)
- Steps are correct and complete (no missing actions).
- Terminology matches internal SOPs and policies.
- Safety warnings and required language are included where needed.
Visual clarity review
- Critical steps are shown in close-up (not just explained).
- No glare hides screens, labels, or measurement marks.
- On-screen text is readable on mobile and laptops.
Audio clarity review
- Voice is intelligible at normal listening volume.
- No distracting noise spikes (tools, door slams, HVAC surges).
- Captions match speech accurately.
Accessibility and compliance check
- Captions are provided for prerecorded training video content (where applicable), aligned with accessibility guidance.
- Training language is understandable for the intended workforce (language and vocabulary considerations are explicitly emphasized in safety training guidance).
- Any required disclaimers, policies, or PPE requirements appear clearly.
Playback test on real devices
Test on a phone, a laptop, and a larger screen. If a viewer can follow the steps without pausing repeatedly to “figure out what happened,” you’re ready.
Common Mistakes in Training Video Filming (And How to Fix Them Fast)
Mistake: “We’ll fix it in editing”
Editing can’t fully fix:
- Bad audio (echo, distortion, heavy background noise)
- Missing shots (no close-up of a key step)
- Poor lighting that hides critical details
Fix: Use a simple on-set checklist: audio test, lighting check, wide/medium/close-up coverage.
Mistake: Poor lighting + auto settings
Auto exposure and auto white balance can “hunt” mid-take, especially if the subject moves or the background changes.
Fix: Lock your exposure and white balance once the lighting is set. Your training library will look consistent module-to-module.
Mistake: Long videos with no structure
Learners don’t need “one giant video.” They need clear objectives and rewatchable modules.
Fix: Segment by outcome and add chapter titles. This aligns with multimedia learning guidance that supports structured, focused instruction.
Mistake: Not filming close-ups of critical steps
Fix: Capture insert shots for anything that could be misread: labels, settings, hand placement, measurements, and final quality checks.
Mistake: No repeatable workflow
Fix: Use templates: consistent intro/outro, consistent framing, consistent lighting plan, and consistent naming/version control.
Cost, Timeline & Planning: What to Expect When Producing Training Videos
What affects cost the most
- Number of modules: More videos often benefit from batching (lower cost per module).
- Locations: Multiple sites add travel, setup time, and logistics.
- Complexity: Equipment demos, safety procedures, or multi-angle steps require more coverage.
- Graphics and accessibility: On-screen callouts, captions, transcripts, and multi-language versions.
- Review cycles: SME approvals and compliance reviews can extend timelines (worth it for accuracy).
Typical timeline (from kickoff to final)
- Kickoff & planning: objectives, format, audience, success criteria
- Script + shot list: approval-ready plan that prevents reshoots
- Filming: batch production for speed and consistency
- First cut: structure, pacing, clarity, and missing-shot identification
- Revisions + graphics: callouts, step labels, safety reminders
- Captions/transcripts + delivery: platform-ready files and version control
Why training videos can reduce operational training costs over time
One major advantage of digital learning approaches is scalability and reduced dependence on repeated in-person delivery—often reducing travel needs and enabling flexible access. Research reviews of e-learning commonly note reduced travel requirements and increased flexibility compared with traditional training models.
Micro-tip: Start with one flagship onboarding module, then build the library using the same setup. Consistency is what makes training scale.
How Storimatic Studio Produces Training Videos (Process + What You Get)
Our training-first approach
At Storimatic Studio, we treat training content like an operational system: clear objectives, repeatable structure, and visuals designed for real learners—not just a “nice-looking video.” That’s how you get training that reduces confusion, supports compliance, and stays useful for months (or years).
What’s included in a professional training video package
- Pre-production planning: objectives, format selection, scripting support, shot lists
- Production: professional crew, controlled lighting, clean audio capture, efficient on-set workflow
- Post-production: structured edits, chapters, on-screen callouts, branded templates
- Accessibility-ready options: captions, transcripts, versioning for teams and platforms (aligned with WCAG guidance where applicable)
- Delivery: platform-ready exports, naming conventions, and library consistency
Optional add-ons
- Multi-language versions and localization
- Screen recordings + software walkthrough overlays
- Roleplay scenario production (customer service, sales, safety conversations)
- Ongoing training library system (quarterly filming days, templates, version control)
Goal-oriented CTA: If you’re building onboarding videos, SOP modules, or safety training content, contact Storimatic Studio for a training video consult. We’ll help you plan the fastest path to a consistent, professional library that your team can actually follow.
If you would rather hand the filming off, Storimatic’s training video service in Calgary shoots your procedures where the work happens and builds them into a library, so managers stay on the job instead of repeating the lesson.
FAQ: Professional Training Video Filming
What equipment do I need to film training videos?
At minimum: a stable tripod, a reliable microphone (often a lav), and controlled lighting. If you upgrade one thing first, upgrade audio. Clear voice instruction is non-negotiable for effective training.
What is the best lighting setup for training videos?
Three-point lighting is the most repeatable standard: key, fill, and back light. For hands-on demos, add soft light over the work surface and film close-ups so learners can see exactly what to do.
Should I use a teleprompter for employee training videos?
If wording matters (compliance, HR policy, customer-facing scripts), a teleprompter helps keep messaging consistent and reduces retakes. For demos, a structured outline often feels more natural.
How do we make training videos engaging without “fluff”?
Engagement in training comes from clarity: short modules, visible steps, real examples, and helpful callouts. Segmenting and signaling—well-known ideas in multimedia learning—help learners stay oriented and retain what matters.
Do we really need captions and transcripts?
They’re strongly recommended. Captions support accessibility and usability—especially for learners in noisy environments or those who process better with text reinforcement. WCAG guidance outlines captions for prerecorded synchronized media and what captions should include.
Transcripts can also help people review, search, and understand content in different ways, benefiting more than only those with access needs.
How do we handle training for multilingual teams?
Plan language versions from the start. For safety-focused instruction, OSHA emphasizes that training must be provided in a language and vocabulary workers can understand—so translation and clarity aren’t optional.
Your Next Steps to Film Better Training Videos
Professional training video filming isn’t about fancy gear—it’s about building a repeatable system your learners can follow. When you plan the objective, capture clear audio, control lighting, and edit for clarity, you create training content that saves time and reduces mistakes across your organization.
Key takeaways
- Start with one objective per video and build modular chapters.
- Prioritize audio clarity before camera upgrades.
- Use repeatable lighting (three-point) to improve credibility and consistency.
- Edit for retention: segment, label steps, add helpful callouts.
- Publish with confidence using a QC checklist and SME sign-off.
Ready to build a training video library that actually works? Storimatic Studio helps teams produce onboarding videos, SOP walkthroughs, safety training modules, and customer education content with professional crews and modern equipment—designed for clarity, compliance, and scalability.
Contact Storimatic Studio to book a training video consult and get a clear plan for your next training module—plus a repeatable workflow for the entire library.
This guide was created by the Storimatic Studio production team, specializing in training video production workflows—pre-production planning, controlled lighting, clean audio capture, and instructional editing designed for real learners. For organizations building safety and compliance training, we align production decisions with clarity-first training principles and accessibility guidance (including captions/transcripts where appropriate).